
I have found that a sure-fire way to spark joy in my life is to bring fresh flowers into my home. In Raleigh, we have several local florists that are really great at what they do. While I would love to have their arrangements in my home year-round that isn’t very realistic. These florists inspire me to try my hand at arranging every so often and it has become therapeutic in a way. I love that no two flower arrangements will ever be the same and there is so much personality in any given arrangement no matter how grand or simple.
While I am no expert, I have found that I have certain practices that reoccur any time I set out to arrange my own flowers. These steps serve as a sort of recipe that I tend to follow to guide each arranging experience. I try to go with the flow and let the flowers speak for themselves – it’s a lot more fun this way!
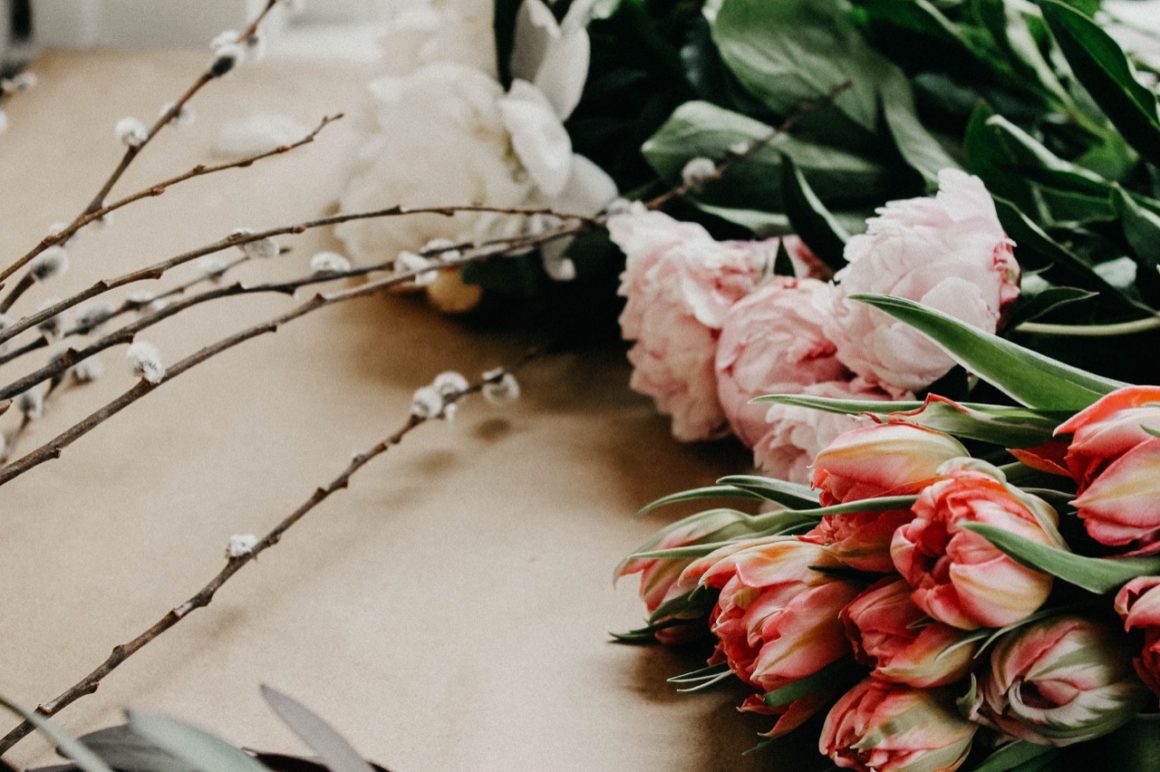
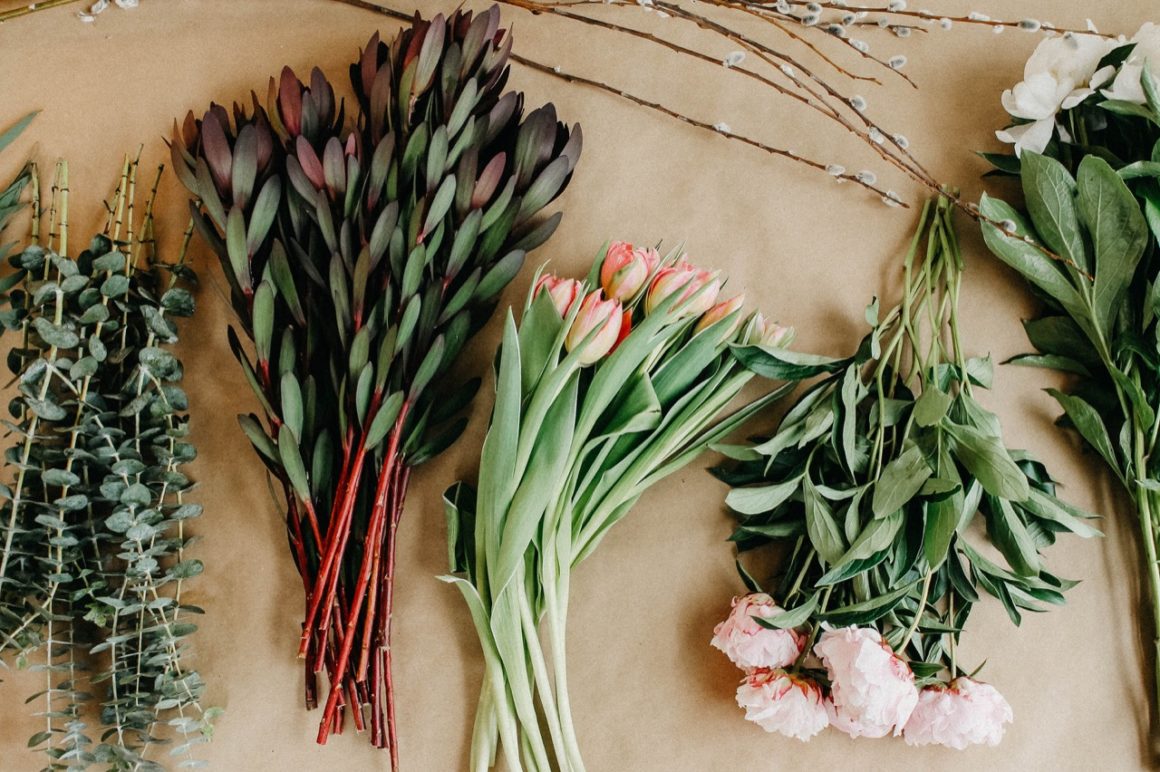
I often source flowers and greenery from Trader Joes since they are usually beautiful and affordable. I also love to supplement with anything I find outside that catches my eye! There is no right or wrong way to play with flowers. I say if you are drawn to it, then go for it! So let’s get to it.
Here are my steps for arranging your flowers at home.

1. Gather and prep materials
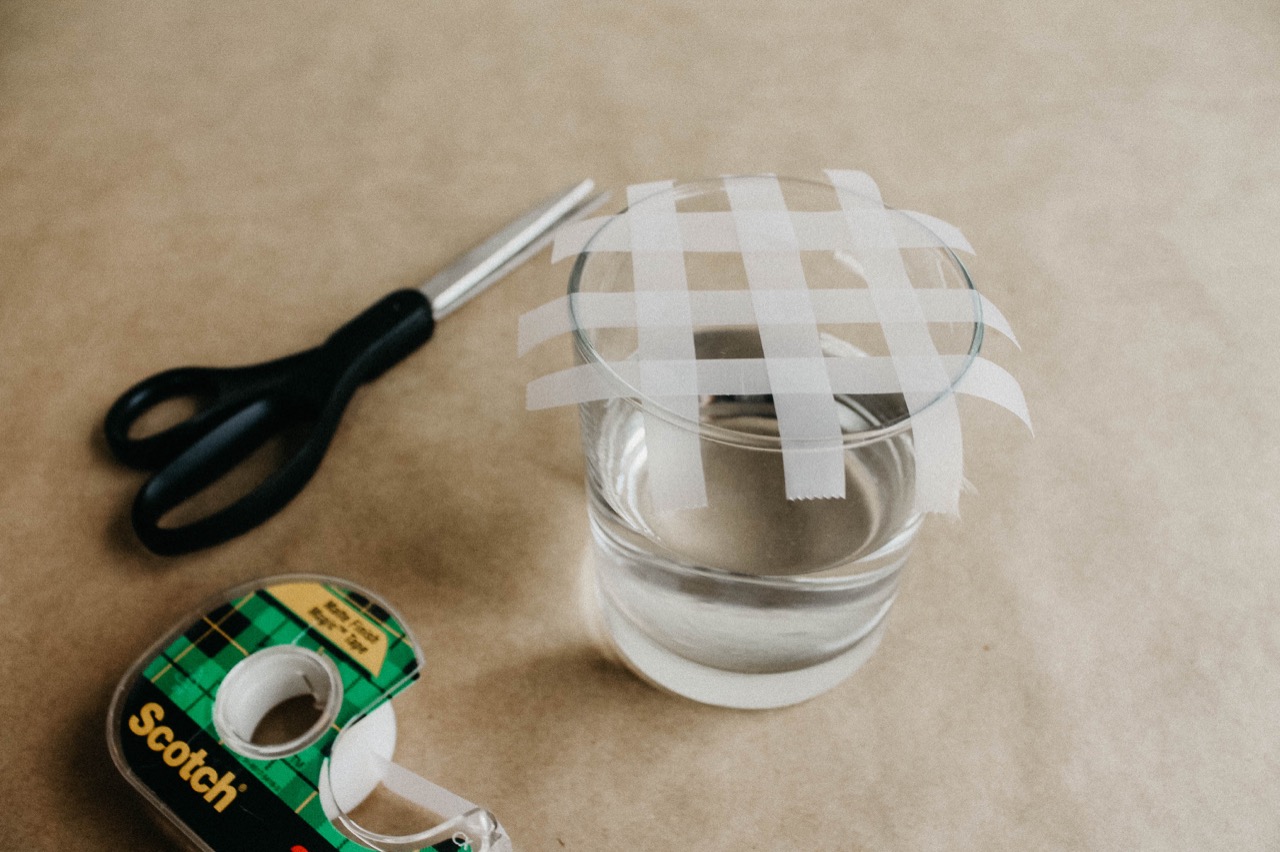
Start by preparing your space and materials. I like to clear a large space either on the floor or at a table. You can lay out some newspaper or craft paper to protect your area as well. I make sure I have clippers, scissors, clear tape, and my vessel close by. Make sure your vessel is about half full of water. Then go ahead and organize your flowers and greenery by type. At this point, I will unwrap any packaging and trash that so it is out of the way.
2. Prep your vessel
Any time I arrange flowers, I create a tape grid on top of the vessel. This will help stabilize your arrangement and make placement easier when starting. I cut several strips of Scotch tape in half lengthwise then placed them on top of the vessel and trimmed the edges so there is a 1/2 inch past the vessel lip. Secure the tape ends down the side of the vessel. You may also use a floral frog or chicken wire in place of a tape grid but I find tape to be a more accessible method.

3. Begin arranging
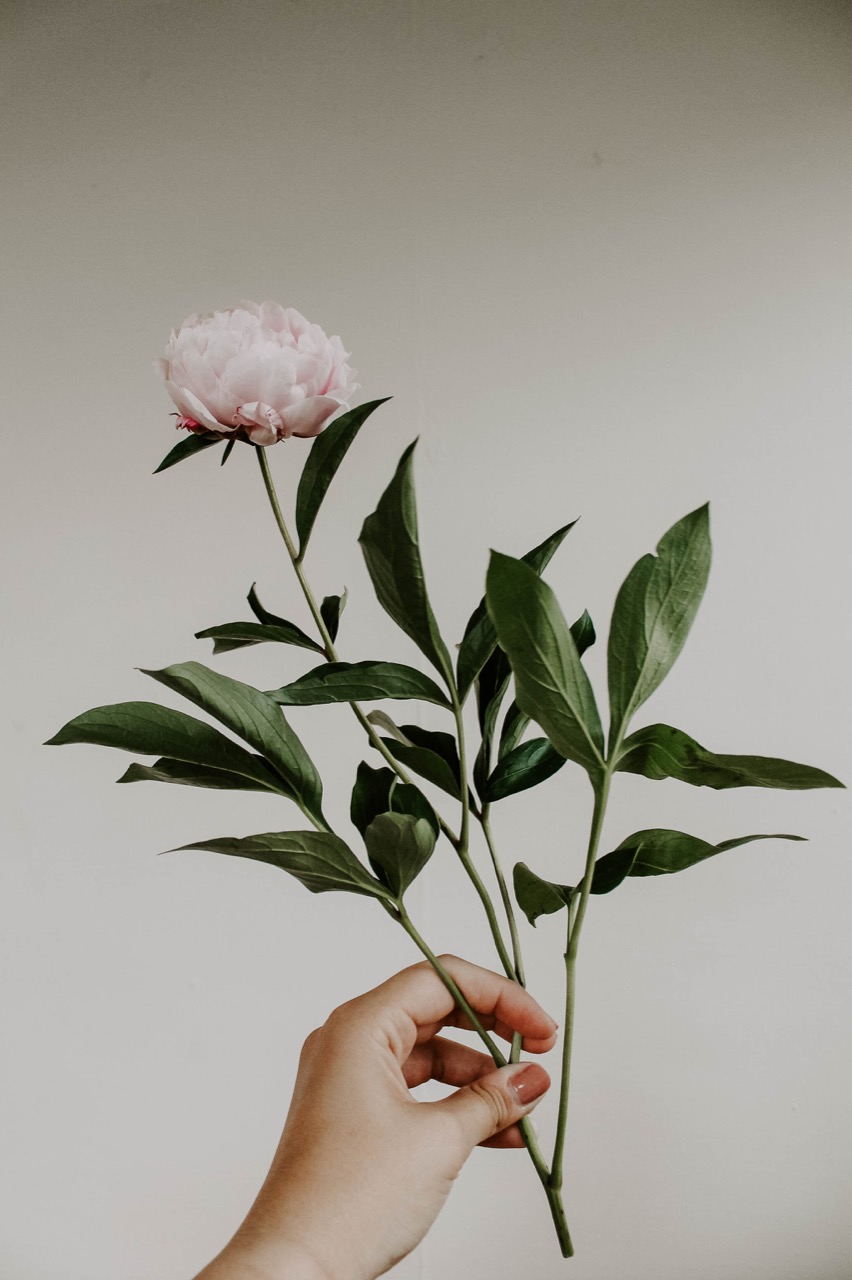
I find the easiest way to begin an arrangement is to identify the more structural pieces of greenery or flowers. Starting with these pieces will help guide the overall shape of your arrangement. To identify these pieces, I will grab various stems and hold them straight up to see their natural shape and curve. I typically like for arrangements to have asymmetry so the eye will follow the work from one side to the other. I choose to start with this stem because of its natural curve. Make sure that you trim all stems and remove any lower leaves that would come in contact with the water in your vessel. These steps will prolong the life of your arrangement.
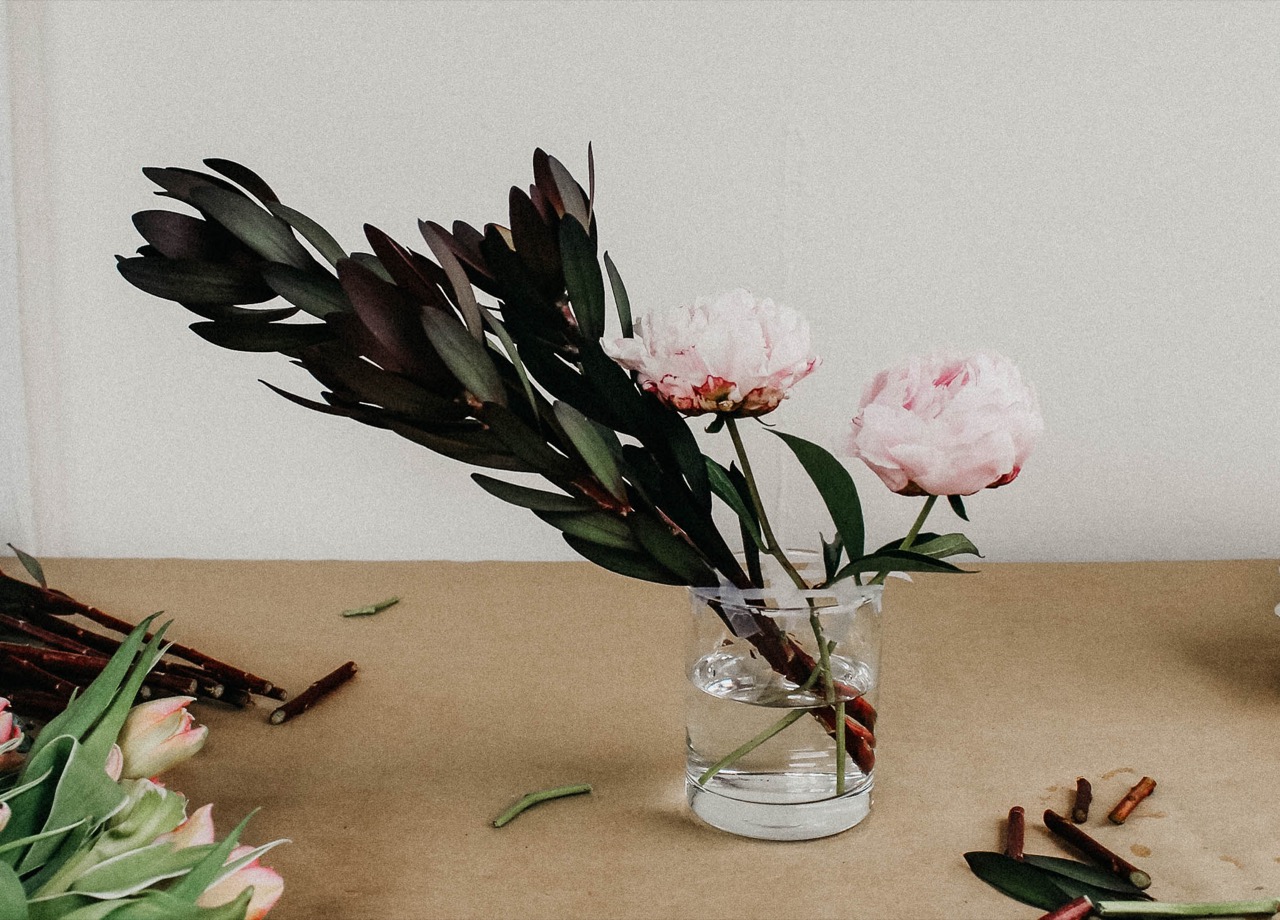
4. Add in larger flowers
Once I have a few stems placed, I will begin to add in some of the larger focal flowers. In this case, I began to include some peonies. Again, I wanted to focus on asymmetry so I gathered most of the peonies in one area and planned to place some smaller flowers in the adjacent areas. Generally, when placing larger flowers I will cut the stems short in an effort to keep these blooms lower to keep the arrangement grounded.
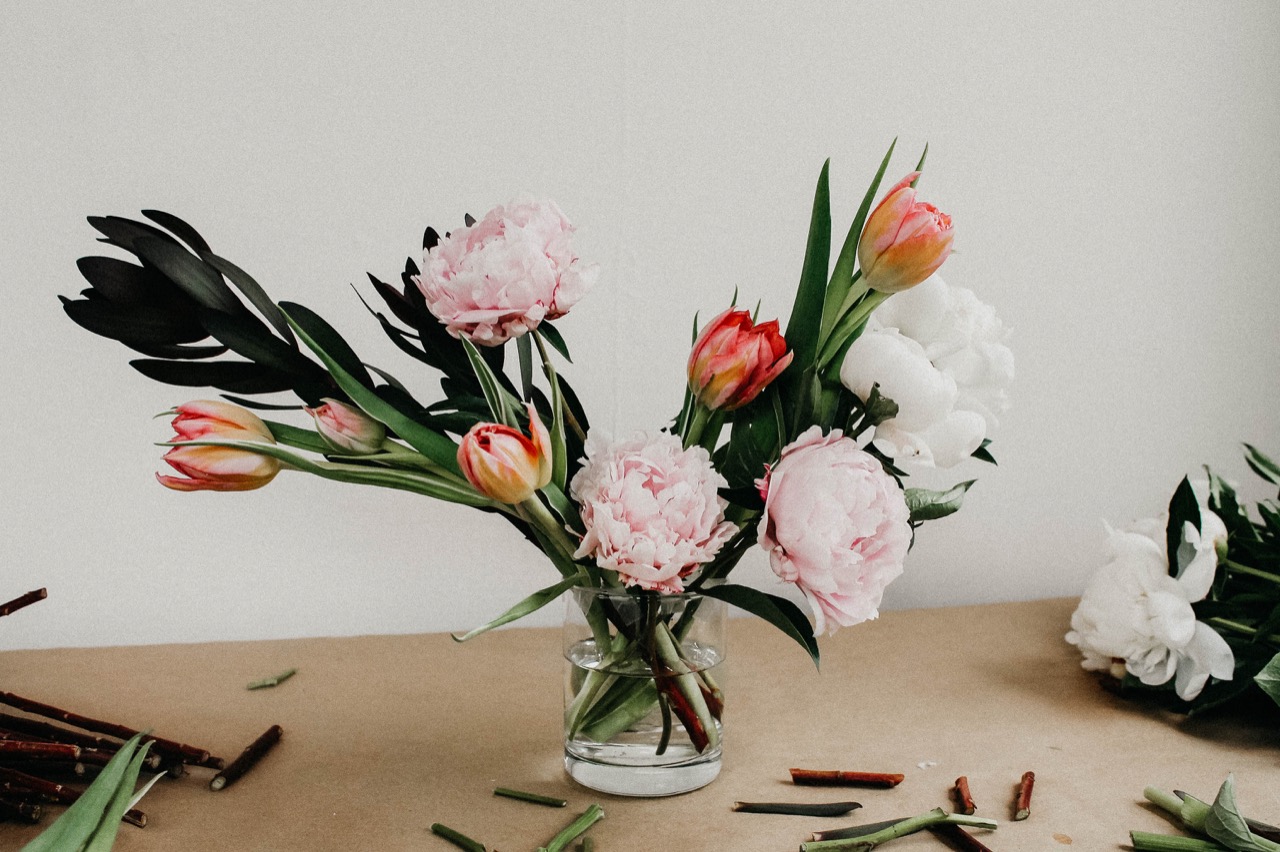
5. Fill in with secondary blooms
After the desired shape begins to take form, I begin to include some smaller, secondary blooms to fill in some of the larger gaps. Again, I try to ground my pieces with anything that is medium to large size and allow for smaller and longer stems to add height or length to draw your eye through the piece. You can see how I have added the tulips here to emphasize the curve while also filling in the in-between spaces.
Quick tip: Consider placing your vessel on a lazy suzan while arranging. This way you can turn your arrangement every so often to ensure you are designing a piece that will be beautiful when viewed from any angle.

6. Fill in with greenery
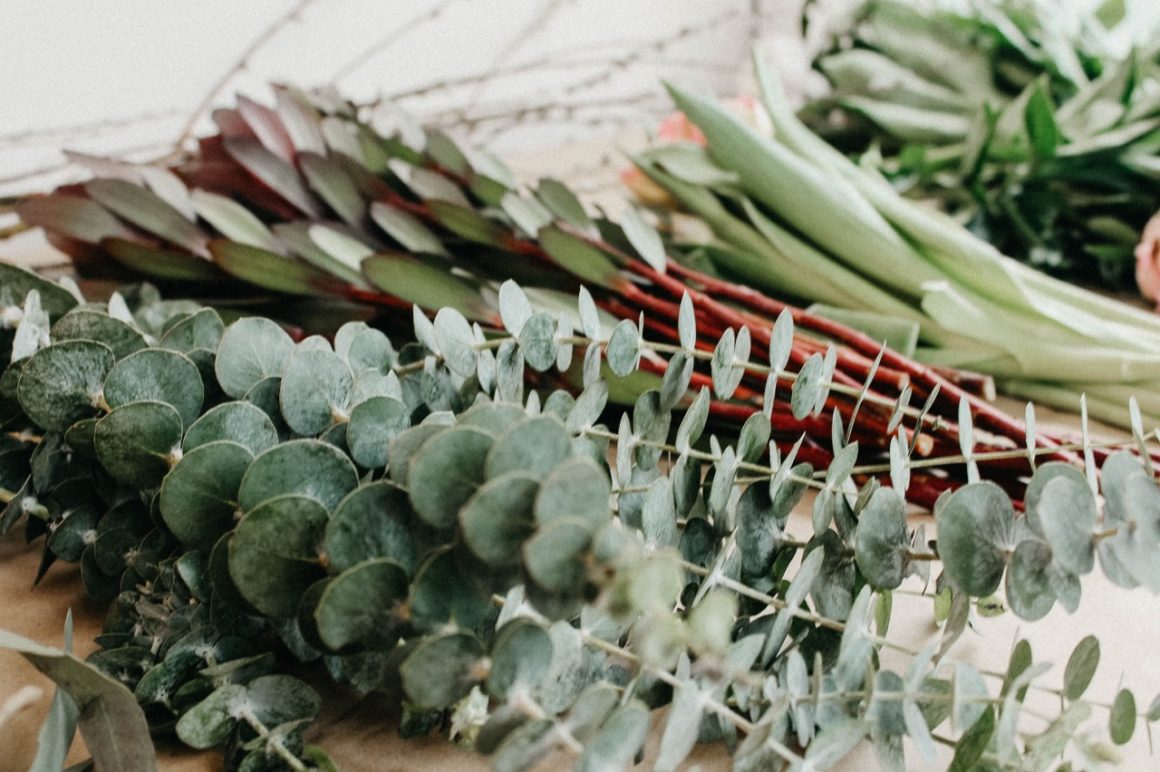
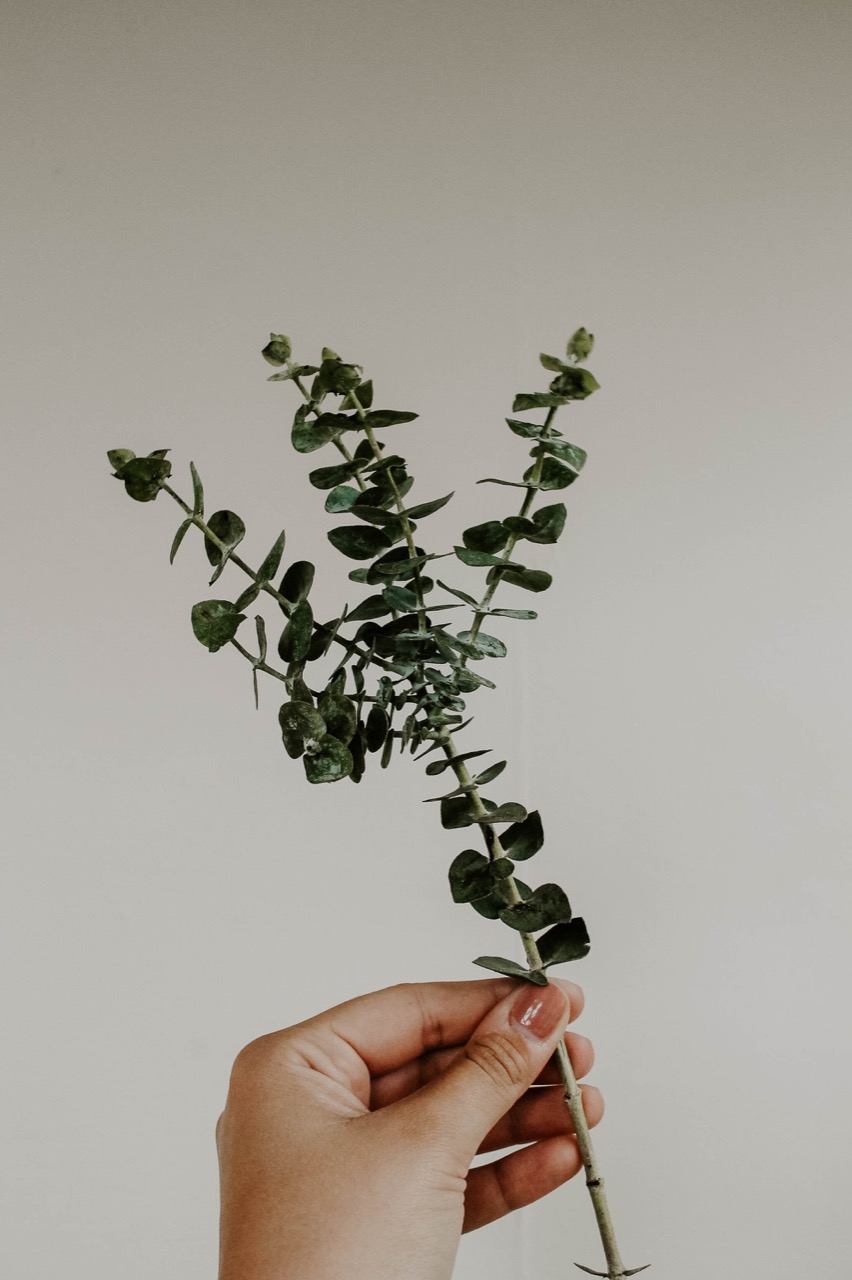
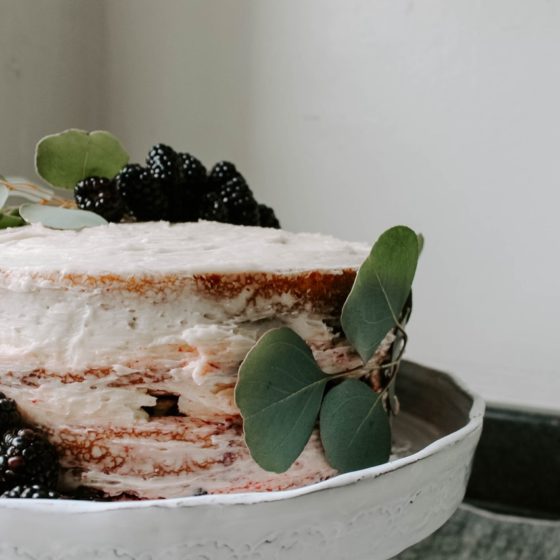
At this point, you want to be careful not to add too many flowers, or the arrangement will become overcrowded and end up in a jumble. I try to always have some fuller greenery stems on hand that will help fill out the remaining spaces nicely without taking attention away from the intended focus. Here I have used eucalyptus to do just that.

7. Add finishing touches to enhance the shape
To finish off most of my arrangements, I like to add a few more strategically placed stems to enhance the overall shape and again help draw your eye through the piece. I liked how this piece was a bit more full on the right side but also liked the height of the upward curve on the left side. Before adding the pussy willow stems, it felt as though the two sides were a bit uneven because of how full the right side was. Adding in just a few of the pussy willow stems helped to increase the height and balance out the two sides. Additionally, I like to add in a few grounding pieces of greenery that fall over the edge of your vessel. I absolutely love included stems that drape down low like the variety of eucalyptus I have added here. This enhances the organic nature of the piece while also helping to camouflage your tape grid.
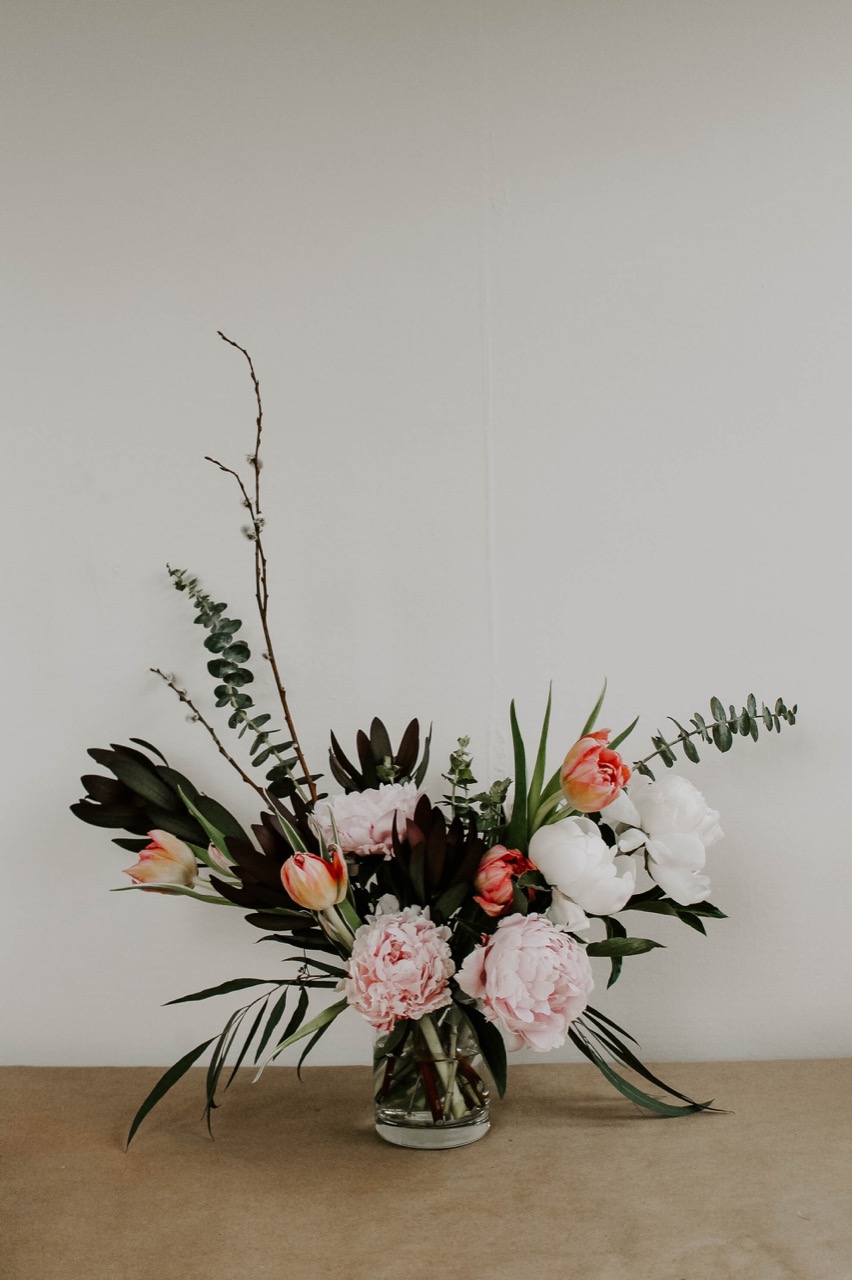
And there you have it!
One more tip for the road – do not be afraid to edit at any point while arranging. There were several times during the creation of this piece where a stem I had in place was not acting in a way that supported the overall arrangement. It is completely okay to move things around in order to adapt to the direction of your piece. As I said, the steps I laid out here are really just a guide and every arranging experience is completely new and different. Allow that sort of spirit to come through in your own arrangements and feel free to ask any questions in the comments!
I hope this has been a helpful guide to creating your own flower arrangements at home. I really enjoyed creating this piece and can’t stress enough how a project like this should be fun!


Wonderful beat I wish to apprentice while you amend your web site how could i subscribe for a blog web site The account aided me a acceptable deal I had been a little bit acquainted of this your broadcast provided bright clear idea
Mygreat learning This was beautiful Admin. Thank you for your reflections.
I do believe all the ideas youve presented for your post They are really convincing and will certainly work Nonetheless the posts are too short for novices May just you please lengthen them a little from subsequent time Thanks for the post
Insanont For the reason that the admin of this site is working, no uncertainty very quickly it will be renowned, due to its quality contents.
Usually I do not read article on blogs however I would like to say that this writeup very compelled me to take a look at and do it Your writing style has been amazed me Thank you very nice article
Noodlemagazine Very well presented. Every quote was awesome and thanks for sharing the content. Keep sharing and keep motivating others.
Noodlemagazine Pretty! This has been a really wonderful post. Many thanks for providing these details.
Djgamedownload, okay so it allows to download cool dj game stuff! I like it a lot to be honest, the variety of resources is pretty wide. djgamedownload
Really great read — I appreciate how clearly you explained the importance of local online presence for businesses today. It’s a topic many companies overlook, i find it very interesting and very important topic. can i ask you a question? also we are recently checking out this newbies in the webdesign industry., you can take a look . waiting to ask my question if allowed. Thank you
Feeling lucky? Tried out 87lucky. Got a few near wins, which is promising, right? The site design is clean, and I liked the options available. Worth checking out: 87lucky
Played at five88vin last night. Had some ups and downs, ya know how it goes! Site’s easy to navigate. Withdrawals were smooth, which is always a plus in my book.
Thi is a great article no doubt about it, i just started following you and i enjoy reading this piece. Do you post often ? we have similar post on the german best freelancer platform called https://webdesignfreelancerdeutschland.de/ you can check it out if you want. Thank you
Logging into jl9login was quick and painless! The registration process was also simple, which is a huge plus for me. Getting right to the fun stuff! jl9login
Great article! I really appreciate the way you explained everything so clearly – it feels like you put a lot of effort into making it useful for readers. I’ve been exploring different tools and resources myself, It’s been a game changer for me, and reading your post actually gave me even more ideas on how to apply it. Thanks for sharing such valuable insights!
wow i really enjoy reading this, do you post often ? i will check back for more update, you can also check me out at https://webdesignagentur.de.com/ one of the top Marketing Directory site in Germany
this is an interesting article, i enjoy reading it, keep up the good work, do you post often, i want to start following you. my site is https://webdesignfreelancermunchen.de/ it is the top webdesign freelancer platform in Germany.
Plataformafogo777 is on FIRE! Seriously, really enjoying playing there. Give it a shot if you’re looking for a fun experience. Jump in on the flame here: plataformafogo777
Been trying out lcggame lately and honestly, it’s got some pretty cool games. The site’s easy to navigate and I haven’t had any issues so far. Worth checking out if you’re looking for something new. lcggame
Has anyone else tried wstar777? What do you think? I think it could be better, but some people like it. Check them out! wstar777
Gotta say, Cassino222 is a pretty decent online casino. The games are fun and the site is easy to navigate. Not a bad option if you’re looking for something new. Give cassino222 a shot!
So I’ve explored a little to f88 club on f88proclub.com today. Not bad at all. Everything I looked for was easy to dig up. Just hoping it keeps being updated often! Click here for f88 club.
Yo, anyone tried Bet100Casino? Thinking of dropping a tenner to see what’s what. Let me know if you’ve had any luck! Find them at bet100casino
https://shorturl.fm/mxdzj